How to Manage Photos On Top of Your New Profile & Facebook Pages
I’m really grateful to Are for he had posted a great question here. I haven’t actually wrote a detailed post about photo arrangements for either New Profile or the upgraded facebook page.
This week would be a great opportunity to go more in depth with both platforms! Truth is, we do need all the visibility we can get in facebook these days. Not to mention the ability to control which photos to show or hide from public eye.
Section #1 : How to Manage Your Photos in New Profile
It’s always important to check your privacy settings before applying any changes to your personal profile. For your new profile, all the photos appearing on top of your wall are photos been tagged by you or your friends. Make sure you are clear of the privacy setting that controls who can view your tagged photos at #2 of this post.
Now, let’s proceed with our photos arrangement in a new profile:
Creating a Profile Banner
In a profile banner, photo sequence is everything! There are many ways you can create a banner, some suggested to use app like Profile Banner but personally I prefer self-customization. I simply created a banner with the size of 485px x 68px and divided them into 5 photo strips. More about the photo size at Section #2 later, but once you got your photos ready:
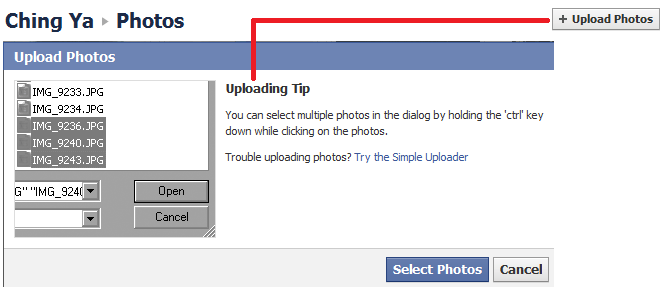
1. First of all, upload your photos to your selected or newly created photo album in new profile:
2. When the photos are uploaded, you may choose to whether ‘Publish Now‘ or ‘Skip‘ it for later. I would go for ‘Skip’ as the news feed about your tagged photos will be updated anyway when we apply the tagging later.
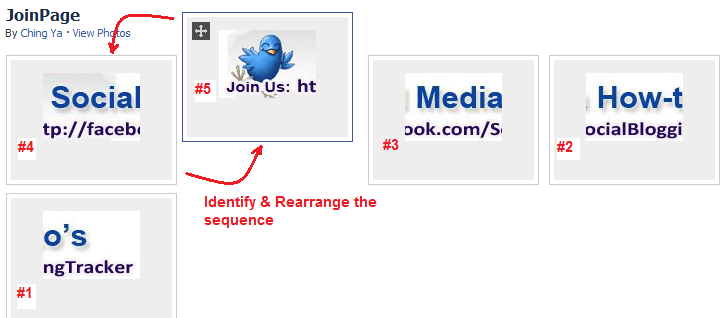
3. Now in your album, identify your photo sequence and rearrange them if need to.
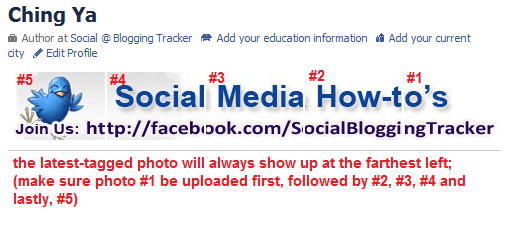
4. Before applying the photo tagging, do take note that the last photo you tagged will always show up at the farthest left on top of your profile. So if your photos are telling a story or been arranged to form a banner, make sure they are displayed so photo #1 is the first to be tagged, followed by #2, #3, #4 and #5 as shown below:
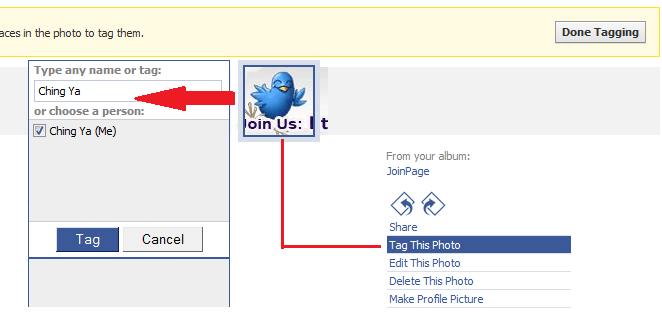
5. To tag a photo is easy, simply go to your album and tag your photos in proper sequence. Select the photo -> Tag this Photo ->Type or Choose your own name in the box -> click ‘Tag’ -> Done Tagging:
Solution: Unwanted Photos due to photo tagging by friends
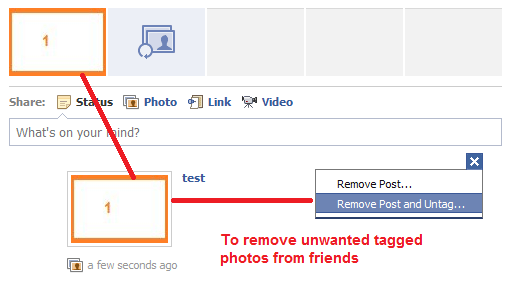
Your profile banner can be easily disrupted once your friend had tagged you in another photo. Since there is no way to prevent people from tagging you, you can manage the unwanted tagged photos by:
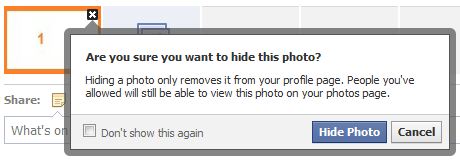
i) Hiding tagged photo by ‘x’ (mouseover)
ii) Remove and untag photo from Wall
Section #2 : How to Manage Your Photos in (Upgraded) New Facebook Page
In the most recent post about enhancing your upgraded facebook page (some new tips were added at ‘Extra Tips‘ section in that post, do check them out!), the #1 advice is to make use of the photo row to attract fans attention effectively. Unlike personal profile, these photos are not only tagged photos of your facebook page but also:
- Your most recent uploaded photos
- Randomly arranged
Obviously a page banner is not possible for now since we cannot control the photo sequence. Even so, there are some easy, exciting ways you can use the spot for publicity. See how my friend, Nancy is smart on making sure her business messages are sent through via the photos on her page:
From what I see, this is by far the best way to present the photos until other methods come around. Without further ado, let’s see how we can learn from Nancy in controlling our photos on top of our fan pages:
1. Create and optimize your photo size to approximately: 97px (height) ×68px (width). (Photo sequence is not an issue here.)
2. Use photo editor such as Pixlr or Photoshop, even your very own Paint (Windows 7 version) to create the photos (more image editing app suggestions refer to section (b) of this post). Make sure the photos are striking enough to capture attention, better with a call to action like ‘Click Here’.
3. When you’re done designing your photos, upload them to your facebook page. Notice you can see them on top of your facebook page as soon as they are uploaded:
4. When your fan clicks at the photo, it will appear as a slideshow. Add image caption or URL that explains your promotion in details:
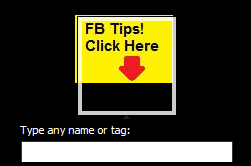
5. If you had added other photos after this, you can still grab the first spot on the left via tagging. Go to your album and select the photo you want to place #1 -> click ‘Tag this Photo’ ->Type or select your page name in the drop down menu -> click ‘Done Tagging’ :
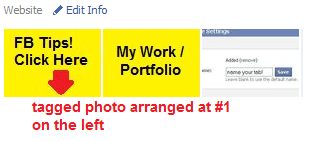
6. Look! The tagged photo will appear just where you wanted it to be (so far only works on #1 photo from the left):
You can add as many photos you like to your facebook page and apply tagging whenever necessary. Of course, you can always ‘hide’ other photos you uploaded so only the default ones are showing on top of your facebook page. Most importantly, use your creativity and make sure each click-through is worth it for your fans.
Now Is Your Turn…
Have you discovered any smart ways to control photo arrangement on both your new profile and facebook page? What other ways you can suggest so page admin can make full use of their photos? Be sure to share your brilliant ideas in the comment below.
Like what you’re reading ? Subscribe via RSS Feed or email so you won’t miss a thing:





Hi Ching Ya..
In my latest article I get honest myself and talk about humility. Well you made very humble here.
Thanks my friend!!
This was an awesome tutorial on how to utilize a valuable Facebook Real Estate.
Facebook is getting a lot more streamlined. Still I see there is some confusion on where to categorize your Fan Page. And the Facebook Page directory is not the best at the moment to find what you really are looking for.
So my next challenge for you will be ‘How To Properly Categorize Your Facebook Fan Page..’..
Again thanks my friend.
Cheers.. Are
You’re welcome, Are. 🙂 Thank you for inspiring me to write about this post in the first place. Will see if there’s any good info for your ‘next challenge’. Thanks again. Have a great day ahead!
Hi Ching,
I had located a post on Mashable back in December showing you different ways to dress up your photos and so I gave it a shot on my own. It turned out okay but not the best I’d ever seen. Then I found an app that would create a banner for you instead of you having to do the photos individually. My post is attached for those who would like to find out how to accomplish this.
I am irritated that you can’t do the same for Fan Pages. You would think that would be more important than your personal profile. But at least you can create a few unique photos and put those in place since their order will randomly change on their own. I have a few but will put more time into that in the future.
You did an awesome job of explaining how you can do this on yourself. Wish I had known this when they first changed over but as I always say, better late than never.
Thanks again Ching!
Adrienne
So great to see you here, Adrienne. Yes, I know what you mean. 🙂 I was surprised that fb didn’t allow us to control the photo sequence like in profile’s. It’s actually a perfect asset for page admin, especially we are getting less and less visible spot in our pages. Really hope one day we can customize our own business banner and place it on top with proper sequence.
Thanks so much for your wonderful encouragement. Do have a great week ahead!
I am so glad I was over on BizSugar tonight and saw this. I haven’t seen pages using this yet but had heard someone off-handedly mention it. Thanks for giving me a weekend project!
BTW I need to catch up with you on Twitter
@mmangen
What a pleasant surprise to see you here, Michelle. 🙂 You’re right, we have so much to catch up on! Wish I could be 24/7 on Twitter like before but due to recent health issue, I have been limiting my time online. Even so, be sure to show us your masterpiece when you’re done with it 🙂 Will love to have a look at it!
Hugs and chat soon!
Wow, this is definitely the guide I’m following to correctly configure my Facebook profile.
Absolutely loved this and the past posts seem to be full of great content as well, thanks Ching!
Thank you Sergio and welcome to my blog. It’s always a joy to see a new reader stopping by. Hope to see you here often and feel free to share your knowledge or any social media questions if any, we all could learn from one another.
Have a great day ahead, thanks again for your kind words. 🙂
Ching ya if you knew how much of a facebook idiot I was you would be very disappointed. I don’t use it to market for anything. I’m always watching your articles and you have been able to use facebook to your advantage better than anyone I know in the entire blogosphere.
I guess when ti’s all said and done I’m rather just lazy or not interested. I also think it has something to do with my account which is real life friends and not online marketing friends like blogengage or twitter.
Hi Brian, thank you so much for visiting and really appreciate your comment. 🙂
Yes, facebook has gradually evolved and actually for most of my friends, they still not quite convinced that facebook could actually help in their business. That’s absolutely normal and frankly, I do miss how facebook was before where things are less complicated and ‘business-like’.
Even so, it’s great that facebook allows us to create facebook pages that mainly for our business/official use. And with the latest upgrade where we could comment as our page but instead our personal profile, it gives a great solution to separate our personal lives with business contacts. 🙂
No worries, if you ever feel like ready to setup a facebook page for blogengage, be sure to let me know. I may not be the expert, but I’ll be happy to support your idea and any help I could give. Keep up the great work!
I love this post, especially with the recent change on Facebook. So helpful, thanks for your guidance Ching Ya. I am always so at lost when it comes to Facebook. Too much confusion with many changes in between 🙂
Hi there!
Thanks for the post. I had used a different app than the one you mentioned, but glad to have another resource.
It seems like this is only available for profiles. Have you found an app that facilitates for Pages?
You are always insightful…
~Keri
Thanks so much for your description and instructions of this important feature. My question is: do you know of anyway to make the photo sequence at the top of the page permanent? In our business we upload many (50+)photos, nearly daily. Is there any short cut to keeping our 5 photos in the banner without going through a daily ‘hide’ clicking session?!
Thanks again,
Rachel
Hi Rachel, unfortunately there is no way to make the images fix on the page according to preferred sequence for now.